Group Leader Help Page
On the Group Management page, below the group heading and drop down list, you will see an indicator of seats remaining and total seats for the group you have currently selected, and a list of links to the courses associated with that Group (see Fig. 1 below). As groups change over time (seats are added, courses are added to groups, etc) this information will be updated for quick reference.
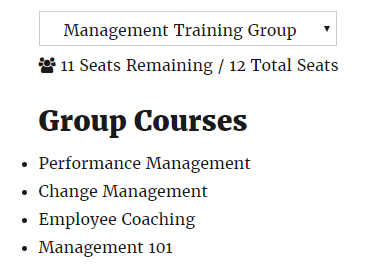
Fig. 1. Group information is updated automatically as seats and courses are added or removed from Groups.
The next section of the page is the Enrolled Users list that contains a row of buttons for the main management functions that are available to Group Leaders on the front end (see Fig. 2 below). The Enrolled Users list is the current list of your group users, their email addresses, their status, and their enrollment key (more about keys and user status below).
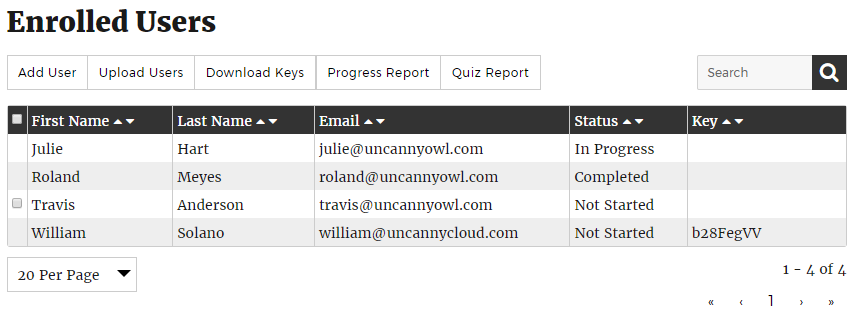
Fig. 2. The Enrolled Users list is where you find the main controls for group management.
Adding Users to Groups
When you click on the Add User button a form appears with three options: Add and invite a new user; Add a new user by sending an enrollment key; and Add an existing user (see Fig. 3).
If you select the Add and invite user option, you must correctly enter the users first name, last name, and email address to add them to a group. Once you click the Add User button an email is sent to the user based on the email message settings set up by your administrator. The user is added to the list of users in the group and they take up a seat in your group, and their status is set to Not Started.
If you select the Send enrollment key option, the add user form is simplified, and at this point, all you need is a valid email address for the person you want to add and you can assign them a key, take up a seat in the group and send them an invite via email. Once that user logs in and redeems that key, they are enrolled in the group can begin group courses.
Similarly, If you select the Add Existing User option, the add user form is simplified, and all you need is a valid email address for the person you want to add. In the case of adding an existing user, the system will check user information to validate that the address exists. Once that is done, a key is assigned to them, the user is added to the group, an email is sent to the user, and they occupy a seat in your group with a status of Not Started.
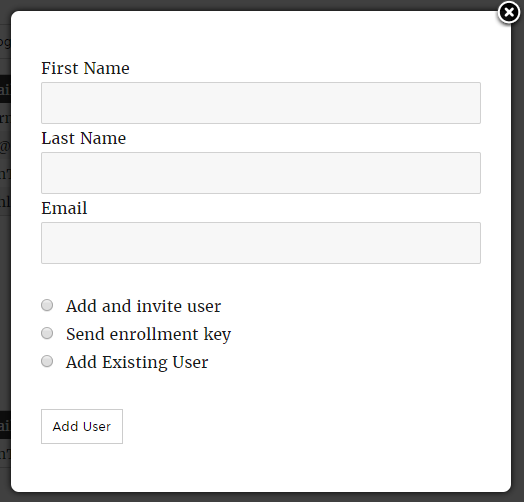
Fig. 3. The Add User form will automatically simplify itself for cases when all you need is a valid email address.
Adding Users in Bulk
Users can be also be added in bulk by clicking on the Upload Users button and uploading a CSV file. The Upload Users form has options similar to those described above, with one major difference. When uploading a CSV file, you can choose not send an email to the list of users you are uploading (see Fig. 4 below). You might want to do this if you plan to distribute enrollment keys to your users some other way.

Fig. 4 The Upload Users form
For the bulk upload to work properly, a CSV file formatted with the following column order and headings must be used: user_email; first_name; last_name. CSV files that have incorrect formatting of email addresses, column names, etc will not be uploaded. You can download a sample file here: group_management_user_upload (.CSV file, 58 bytes).
Tip: CSV files created and saved from some versions of MS Excel for Windows can sometimes add special characters that prevent the file from being uploaded. Platforms like Google Sheets work well with the bulk upload function and tend to avoid formatting issues found with various spreadsheet programs.
Downloading Group Keys
To download a full list of enrollment keys to be used for manual tracking, reporting, and distribution, simply click on the Download Keys button (see Fig. 2 above) and you will begin downloading a CSV file. This list is the current list of unassigned keys for that group. This list is updated when the number of seats is initially set for the group and when additional users and seats are added or removed from the Group.
How to Add Additional Group Leaders
The lower section of the Group Management page is your Group Leaders list, and this list also has buttons located above it for adding, or sometimes removing, Group Leaders. Similar to the Enrolled Users list, the Group Leaders list displays the current Group Leaders by first name, last name, and email (see Fig. 5).

Fig. 5. The Group Leaders List is where you can identify, add, or remove Group Leaders.
Adding more Group Leaders to your Group is even easier than adding users. Click the Add Group Leader button. Fill out the first name, last name, and email address of the person you would like to add. If you enter the email address of an existing user, the form will not alter the First Name and Last Name fields of that user, but will add them as a Group Leader, and send them a welcome email. If the user you added as Group Leader is new, they will be sent an email welcoming them to the site and the Group, as outlined in the email message settings set up by your administrator.
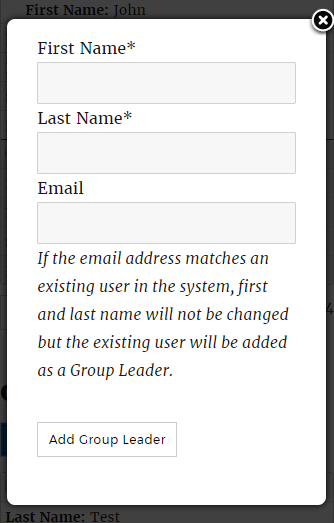
Fig. 6. The Add Group Leader form
How to Remove Users from a Group
When logged in as a Group Leader, on the Group Management page, select the users you would like to remove from the Enrolled User list, and a Remove User(s) button will appear. Click on the Remove User(s) button. You will be prompted to confirm your action.
You can only remove group members before they have enrolled and begun the courses that are available to them in the group. Once a learner has begun completing the courses that are available in the group, or if they have completed all of the courses and their status is set to Completed, they can no longer be removed from the group. If the enrolled user is also a Group Leader, then they can not be removed from a group.
Removing Group Leaders
To remove a Group Leader, select the users you would like to remove from the Group Leaders list, and a Remove Group Leaders(s) button will appear. Click on the Remove Group Leaders(s)button. You will be prompted to confirm your action.
Group Leaders cannot remove themselves from the Group Leaders list. This must be done by another Group Leader.
Do Group Leaders have access to courses?
In version 1.3 of the plugin we added a setting that determines whether group leaders will also be enrolled as group members, taking up a license seat and gaining access to course materials. If you are primarily selling to organizations where the group leader will administer the group but not need access to course materials, you can check this setting:

In the next section of this article, we are going to cover the important relationships between seats and keys, and how to manage them.
Users, Seats, and Enrollment Keys
In order to track and manage your groups, as a Group Leader, it is important to consider the various ways that the status of a user, group seats, and enrollment keys change as users and Group Leaders are added and removed, and relative to the progress of users through group courses.
When groups are created using the plugin, it generates an enrollment key for each seat that is set for a group. In addition to that, each enrollment key that gets assigned or newly generated by adding seats, is a unique, one-time key. Whenever a new user or a new Group Leader is added to a group by sending them an enrollment key, they are expected to trigger their enrollment by redeeming the key. Once they do their status is changed from not enrolled to Not Started. Once they begin a course, their status is changed to In Progress.
In every case, when users or Group Leaders are added to groups, with or without using an enrollment key on the front end, a seat and key are automatically taken for each user and that seat remains occupied regardless of their enrollment and course completion status.
For example, if your admin creates a group with 15 seats and assigns you as a Group Leader, you are assigned an enrollment code in the background and you occupy 1 seat in that group. When you log in and look at your group via the Group Management Page, you will see that the remaining seats in your Group are now 14. As an existing user, you will already be enrolled and have secured a seat in the Group and your status will be set to Not Started.
Please take a close look at the following table that outlines user status and the status of enrollment keys.